Create a custom map with pins - import data from a CSV or Excel file
Learn how to create an interactive map with pins from a CSV/Excel file. Customize and style the map for your website or app.

Maps make your website more interactive and amusing for customers. They help to represent the information in a more visual and alive way. As a result, people pay more attention to the webpage what increases the page and website rankings.
Mapifator is a map builder that allows creating custom maps and visualizing data on them with ease. In this tutorial, we will show you how to prepare and import data to the Mapifator.
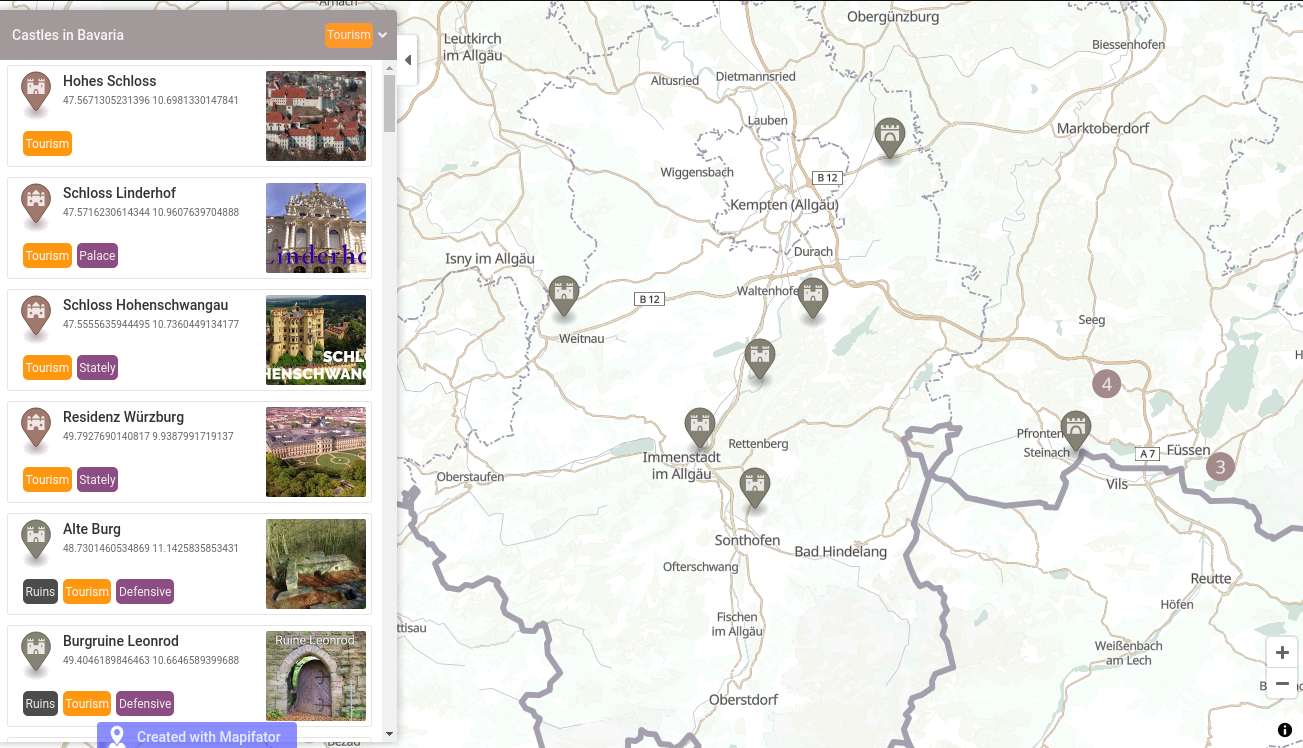
Let’s go through the process and create a “Castles in Bavaria” map together. You can watch the video and follow the instruction below to go into details:
Prepare the data to import it to Mapifator
The easiest way to add places to the Mapifator map is by importing them from CSV or Excel file. There are a few aspects you need to know to prepare your data better for import. Places in Mapifator can have the following data structure items:
- Location - place location, represented as the place address or longitude/latitude coordinates;
- Name - place name;
- Description - place description;
- Media link - a link to an image or Youtube-video;
- Outbound link - an external link to the place details page;
- Feature - A piece of data, that’s displayed as a separate visual block in the place description;
- Tags - A link of tags associated with the place. The tags can be used to filter places on the map;
- Marker - A place marker identification value. Mapifator will create separate markers for different values. This lets you can design each marker separately.
Here is the data source file we used to create the “Castles in Bavaria” map:
We used OpenStreetMap to generate data for this tutorial. Learn more of how to use “OpenStreetMap as geodata source”.
Create a map with Mapifator map editor
OK, data is ready, so the most laborious part is done! Now it’s more fun, creativity, and design!
Import data to Mapifator
You can import data to the Mapifator in a few ways:
- from a “Places” menu tab
- from an “Import / Export” menu tab
The “Import places from an Excel file” will bring you through the “Import wizard” where you need to choose an Excel or CSV file and follow instructions:
Customize and style the map
The importer will import the places and generate all required markers, tags, and features.
All the generated items will have the default design and colors. And you will probably want to customize and style them:

Go to the “Elements” menu and make markers, tags, and features that fit your website design:

Besides, in the “Settings” menu tab you can enable clustering and choose a different map style.
Share the map or embed it to your website or app
When your map is ready it’s time to share or embed the map. “Embed/Share” button and copy the URL or embed code:
