4 Ways to define Map View
Sometimes the default map view in Mapifator doesn't fit your needs. If you have a specific location or region in mind, this article will teach you how to set a custom map view.
When you’re using Mapifator, the map view is automatically adjusted based on the locations of the places you have entered. However, if you would like to define a custom map view, there are a few ways to do that.
Option 1. Change map view in map settings
Firstly, you can specify the custom map view on the “Settings” => “Map Settings” => “View” tab. There you have three options:
Automatic View
If you choose the automatic view, Mapifator will automatically define the map view based on places, amenities, and geometries locations.
Custom View
If you choose the custom view, you can position the map and set the map view according to your needs.
User Location
If you choose the user location option, Mapifator will define your location by IP address and position the map accordingly. In addition, you can set a custom zoom for the map view.
Option 2. Set location + zoom in map URL
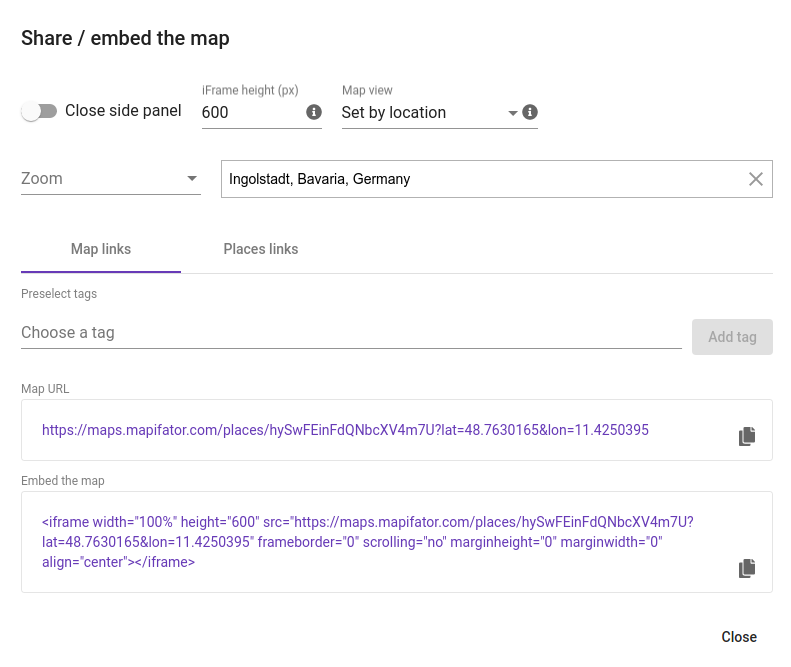
As an alternative, you can use the parameters in the map URL to set a custom view. This way, you can create various map views for the same map.
The Share/Embed dialog allows setting custom Latitude, Longitude, and Zoom level for the map:
You can set your location in the address autocomplete field if you’d like.
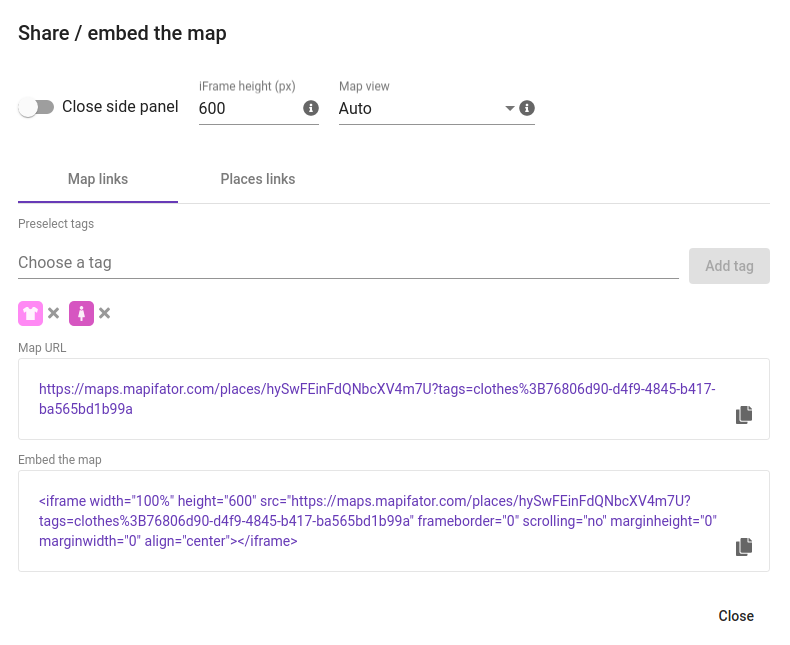
Option 3. Preselect tags to adjust the map to the certain places
You can also preselect places with specific tags. You can use the “Embed / Share map” dialog to generate the map link and add those tags, if you like:
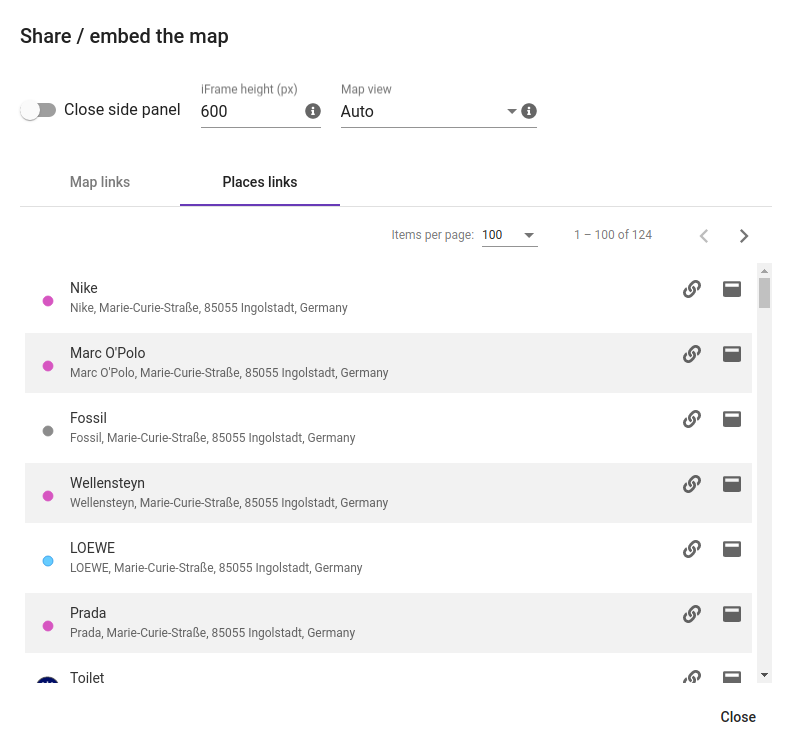
Option 4. Show a specific place
Another helpful map link parameter allows you to set a specific place. You can also preselect a zoom level by using the zoom parameter.
You can generate the link by using the “Embed / Share dialog”:
What’s next
- Go to Mapifator Map Builder
- More Mapifator Tutorials


